Phases and tasks
Once you have a renovation project, whether it started from a closed deal or on its own, you organize the work in its Timeline tab: break the project into phases, then add tasks, milestones, and inspection dates inside each phase.
Open the Timeline tab
- In the sidebar, select Projects, then select the project you want to work on. This opens the project for editing.
- Select the Timeline pill tab, next to Team.
What you should see: the tab opens with your project's start and target completion dates, followed by Project Phases, Milestones & Tasks, Inspection Dates, and a Timeline Gantt Chart further down the page.
Add phases
A phase groups related work together, for example "Demo & Foundation" or "Framing & Rough-In."
-
Under Project Phases, select Add Phase. This adds a blank phase for you to fill in.
If the project has no phases yet, you can instead select Add Suggested Phases to start from six pre-named phases: Phase 0: Planning & Permits, Phase 1: Demo & Foundation, Phase 2: Framing & Rough-Ins, Phase 3: Drywall & Paint, Phase 4: Finishes, and Phase 5: Closeout. You can rename, reorder, or remove any of them afterward.
-
Give the phase a name, and set its Start and End dates.
- Choose a color for the phase, used to tell phases apart on the Gantt chart, and a status: Pending, In Progress, or Completed.
Select a phase's header to expand or collapse it. Each one shows a count of how many tasks, milestones, and inspection dates are inside it.
Tip
If you leave both of a phase's dates blank, they fill in on their own the next time you add a task, milestone, or inspection date to that phase, based on the earliest and latest dates among its items.
Add tasks and milestones to a phase
With a phase expanded, use the buttons inside it:
- Select Task, Milestone, or Inspection Date to add one to that phase.
- Name it, and set its Start and End dates.
- A task or milestone can be switched between the two using the dropdown next to its dates. If the phase already has a named milestone, a task also gets a dropdown so you can attach it to that milestone.
- An inspection date instead gets a field for the inspection type (for example, "Rough Inspection") and its own status: Pending, Scheduled, Completed, or Failed.
Select the X next to any item to remove it.
Note
Tasks and milestones don't have a status of their own to set, and there's no field to assign one to a specific person. Use the phase's status dropdown to show whether that part of the project is pending, in progress, or completed.
Tasks and milestones without a phase
You don't have to assign a task or milestone to a phase right away. Under Milestones & Tasks, below the phase list, select Add Milestone or Add Task to add one without a phase. Once at least one phase exists, a phase dropdown appears on it so you can assign it later, or leave it unassigned.
Remove a phase
Selecting the X on a phase removes the phase itself, but not what's inside it. Its tasks, milestones, and inspection dates move down into the unassigned Milestones & Tasks section instead, so nothing is lost.
To clear everything at once, select Clear All Phases above the phase list. Unlike removing one phase at a time, this deletes every phase along with all of its tasks, milestones, and inspection dates, and can't be undone. You're asked to confirm first.
See it on the Gantt chart
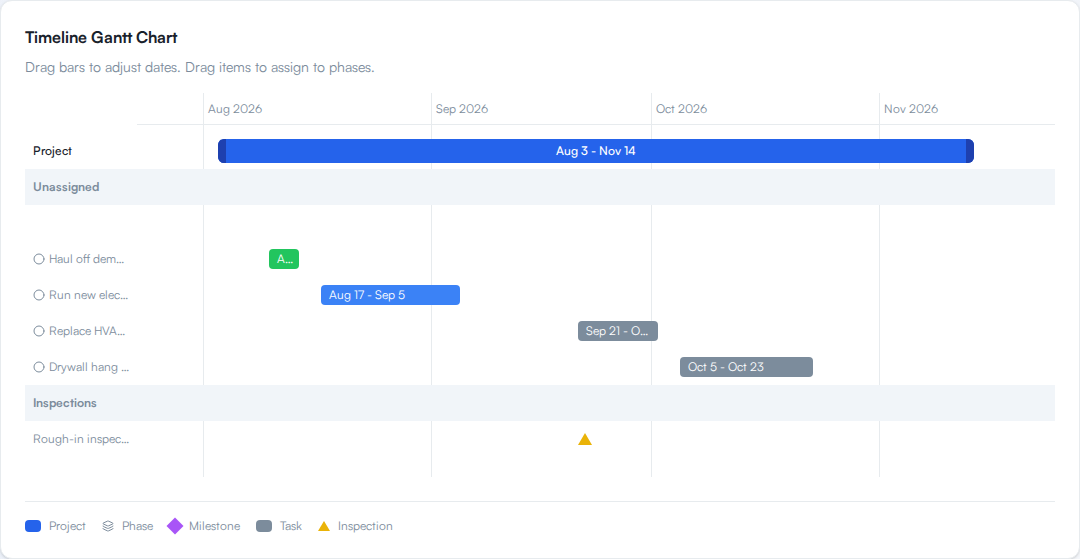
The Timeline Gantt Chart, below the phase and task lists, lays the project, its phases, and their tasks, milestones, and inspection dates out against the calendar, with a red line marking today.
- Drag the edge of the project bar or a phase bar to change its start or end date.
- Drag a task or milestone to move its date, or drop it onto a different phase to reassign it.
- Select a phase's name in the chart to collapse or expand its rows there too.
Save your changes
Phases, tasks, milestones, and inspection dates are only saved when you select Save Changes at the bottom of the page. If you try to leave with changes pending, a confirmation dialog warns: "You have unsaved changes that will be lost if you leave this page."
How progress is reflected
The percentage you see on a project (on its Overview tab, on its card on the Projects page, and at the top of the project workspace) comes from the Progress Percentage slider on the Overview tab. You set it yourself; it doesn't move on its own when you complete tasks or mark a phase Completed. Update it as work moves forward, alongside your phase statuses, to keep the project's progress accurate.
The Tasks area in the sidebar is a separate list
The Tasks item in the sidebar opens a different, general-purpose task list, not the tasks you add inside a project's phases. A task there has its own status (To Do, In Progress, Completed, Blocked) and priority, and can optionally be linked to a project (and a deal) from a dropdown when you create it.
That link is one-directional and just for reference. A task on the Tasks page shows its linked project's name in a Project column, but it doesn't appear anywhere on that project's Timeline tab, and a task you add inside a phase doesn't show up on the Tasks page. Use a project's Timeline tab to plan and sequence the renovation itself; use the Tasks page for a general to-do list that can reference a project for context.
Next
From the Timeline tab, the Budget tab tracks costs against these phases, and the Team tab is where you add the contractors doing the work.